Amy's Treats
  • About
  • Custom Sugar Cookies
  • Contact
  • Blog

Halloween Cookies With Royal Icing

10/30/2016

0 Comments


Holiday (hol·i·day):  A day or season during which one must bake. 
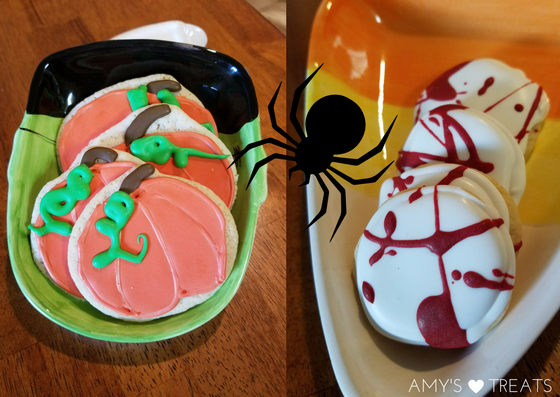
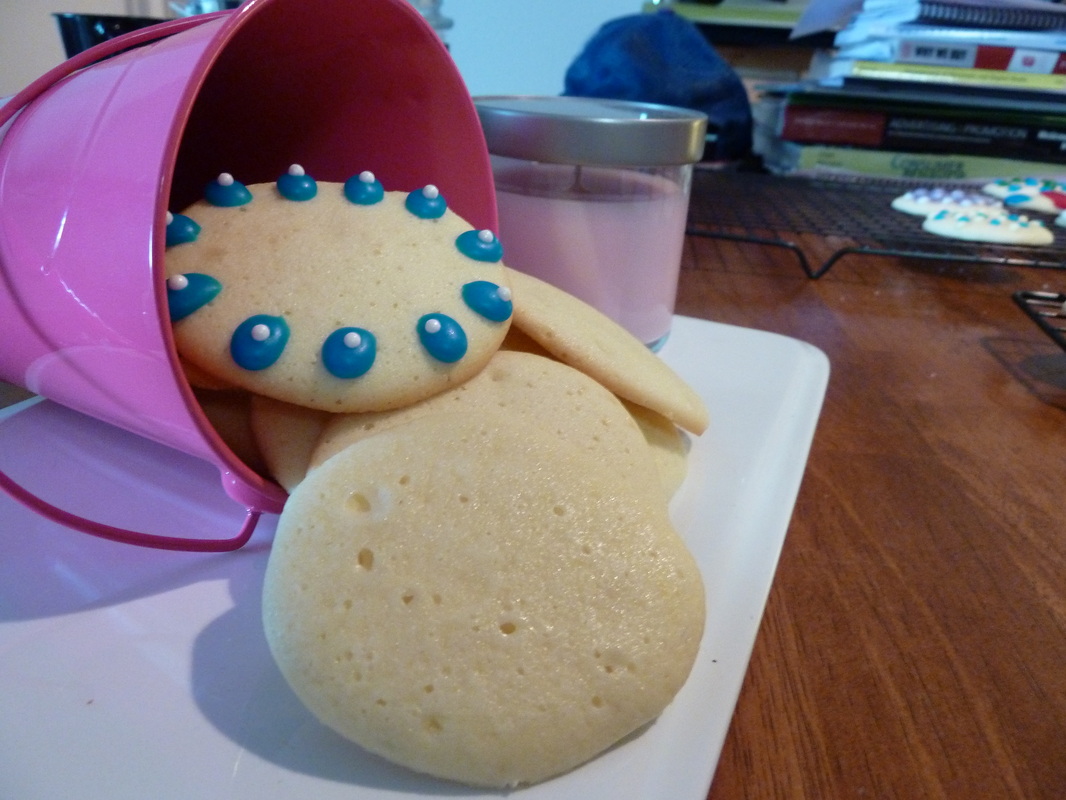
Halloween and holiday cookies with royal icing
Happy Halloween!
What?  No one accused me of being a Merriam or a Webster.  I have been accused of spending way too much time in the kitchen, though.  Usually around holidays.  Easter and Christmas are the givens, at least on this blog, but I LOVE having some Halloween fun too.  A little goblin birdie told me it would be fun to play with royal icing for cookies, so I thought I'd give it a go.  Be gentle, I'm not a pro!
I ventured out into the intarwebz to find a royal icing recipe to whip up at home.  Annie's Eats is where I landed. Before I dashed out for powdered sugar, I may or may not have spent a solid 30 minutes browsing the site.  Annie, I'd eat everything (EVERYTHING) on there. You can view Annie's royal icing recipe here.

Side note:  venturing out into the intarwebz caused me to venture out to my local Publix three times in one day - two times more than normal in a given day. They don't think I'm weird at all​. 
Royal icing consistency
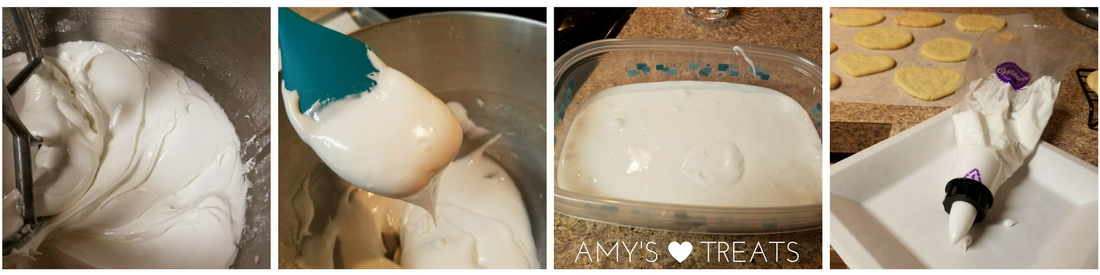
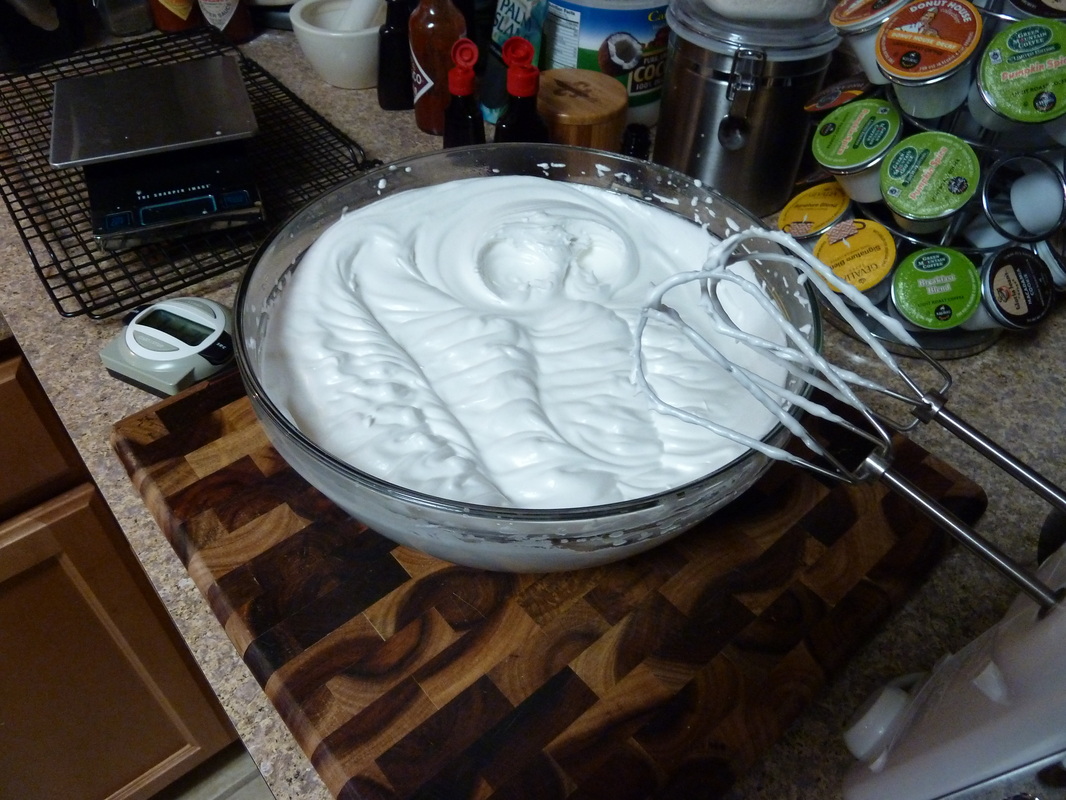
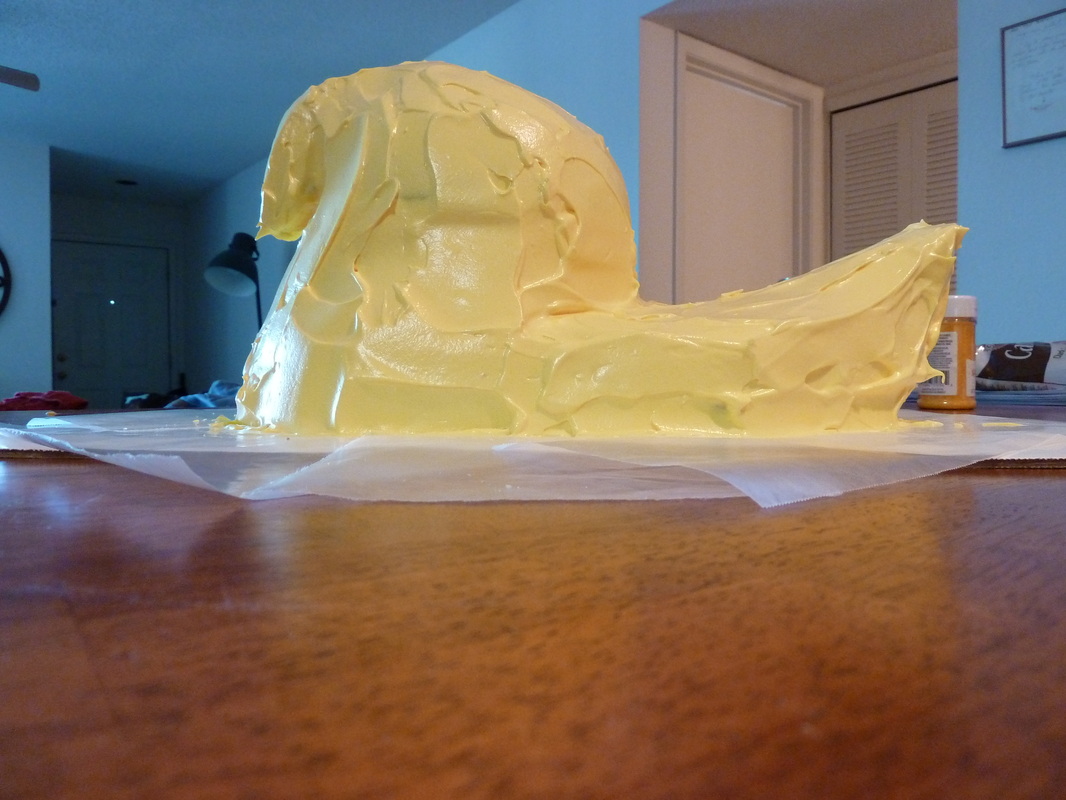
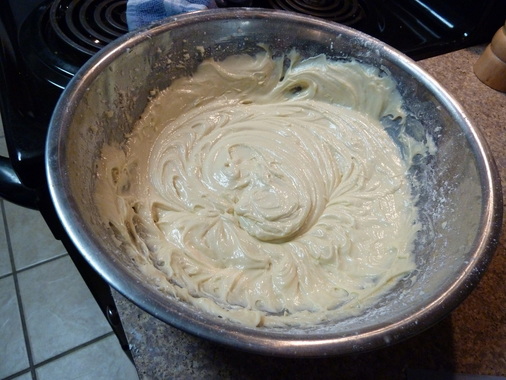
Royal icing, thin consistency.
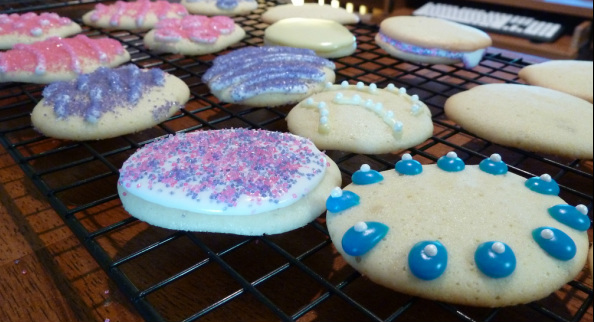
As you can see, I didn't nail the consistency right away.  It should be much thicker, matte, and not so drippy.  Perfect icing never happens on the first try, that's what I say.  Thankfully, it was still thick enough to pipe outlines with, so I forged on.
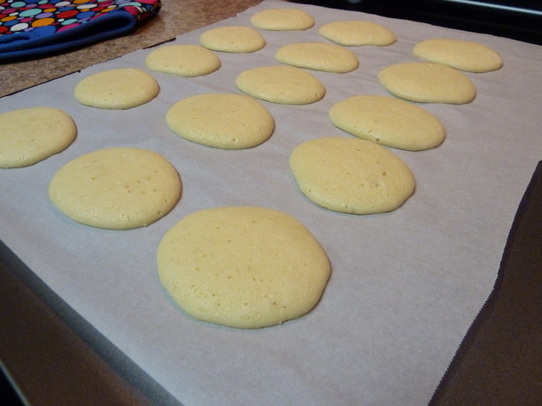
​First, I piped outlines on the cookies.  Why I didn't take more pictures of that part, I don't know. These photos are from the white "bloody" cookies, so the icing is white - but if you're using color,  be sure to add it before putting the icing in a piping bag.  If you want to see more of the outlining process, check out Annie's awesome autumn cookies.  In any case, you do this for two reasons:  One, to give yourself a predetermined area to work within and, two, so the filler icing ("flooding," but we'll get to that in a moment) doesn't leak off the sides of the cookie. 
Royal icing piped outline on cookies
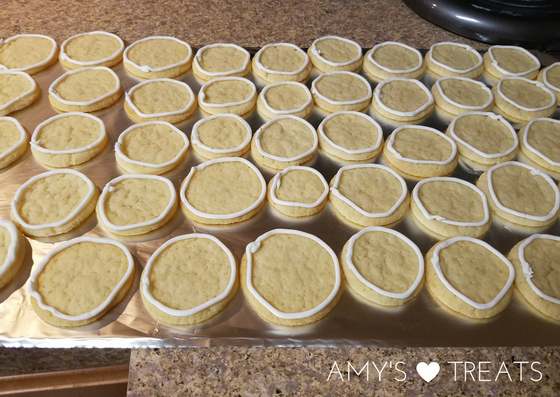
Royal icing borders piped on cookies.
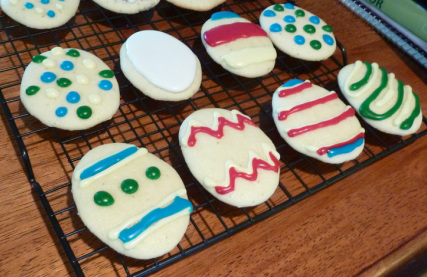
Next up, you need to flood the area of your cookies inside the border. To be on the safe side, I let my borders dry for up to an hour before I mess around with flooding.  Royal icing is pretty thick, so you'll need to thin it out a bit before attempting this step. Add in just a teeny bit of water (less than a teaspoon at a time) and mix in thoroughly.  If you're adding color (liquid or gel), be sure to get that in there so it doesn't screw up the consistency you're going for.  You want it to run off the back of a spoon with ease.  Once you've got that down, pour your royal icing into a squeeze bottle.  You could also use a plastic zip top bag with the corner snipped off if you're feeling brave.  I wasn't in the mood to wear my icing.

Read More
0 Comments

Easter Marshmallow Peep Cake

4/9/2014

1 Comment

 
Huge Peep Cake with marshmallow frosting
Remember how I said Easter isn't a huge cooking/baking holiday for me?  Apparently I'm a big fat liar.  Oops.

The good news?  MARSHMALLOW PEEP CAKE!  Let me take you on a little journey...


Here I am, minding my own business, laying on the couch, grumbling at the dog (she wouldn't stop licking my feet.  These feet are NOT made for lickin'!), leafing through the April issue of Food Network Magazine.  Of course  it's all Easter-y.  Meh.  Enough of that.  It went in the trash (much to the chagrin of media buyers that think magazines have longevity - in my house, they couldn't be more wrong.  No clutter, please!).


Welllllllll the trash needed to go out.  Badly.  I decided maybe I could take the dog and the trash out in one fell swoop (maybe even to the exact same place? damn dog).  You're right, this story has nothing to do with Easter cooking and baking.

The magazine fell off the top off the trash as I was going to tie the bag.  How that happens, I don't know.  I can drop anything (except eggs - I have good luck with eggs. *knocking on wood*), so I dropped it.   It was one of those "meant to be" movie moments, really.  It fell open-side-down to a page.  I picked it up by its binding, was tossing it in the trash again, and saw what had to have been a veritable sign from marshmallow heaven.

YOU GUYS, IT WAS A 10-INCH-TALL PEEP.  A MONSTER PEEP.  A DESCENDANT-OF-DINOSAURS-SIZED PEEP!!!!  

Okay.  Okay.  It was a cake.  IT WAS A PEEP CAKE! A BIG OL' EASTER PEEP CAKE!!  Like this:
Food Network Magazine Peep Cake
Photo: FoodNetwork.com
For the recipe, detailed instructions, and more Food Network goodness, you can check it out here.  Me?  I'm here to give you the cliff's notes.

First of all, they mention in the directions that you need two glass bowls to bake cakes in (along with a regular 13x9 cake pan).  If you've never heard of this, it may sound weird.  Just check that your glass bowls are oven-safe.  Many are.
Cake batter in buttered and floured cake pan and glass bowls
Butter and flour your cake pan and glass bowls before pouring in cake batter.
Heed the baking time recommended in the directions!  While my baking times weren't exactly the same as the recipe stated (I just took them out when my toothpick came out clean),  All three cakes took different lengths of time to cook.

Be sure to let the cakes cool on cooling racks for the recommended time (in the original recipe).  If you don't, they may crumble a bit when you go to trim them.  You don't want them all crummy, do you?!  I let them cool for a couple hours, actually, while I went and did other things.  Next, you're gonna have to trim them.  You can't just pile them up and expect them to look like a Peep Cake!  First, trim the corners off your 13x9 cake.
Cooled cake on cutting board
Let cake cool before trimming.
Trimmed cake on cutting board.
Trim all 4 corners as shown - keep the extra pieces!
Now would be a good time to put the base of your cake on your serving platter of choice, or whatever you're going to store the cake on or in.  This is a good time to share one of my favorite tips with you.  Ever wonder how people get the cake they're decorating perfectly situated on their cake plate or serving platter without getting any frosting or decorations on said platter?

Take long strips of wax paper and just BARELY wedge them under the base of your cake - so they're easy to pull out when you're finished.  This way you'll get the frosting (and sugar) on the wax paper, and it will go away with the wax paper when you pull it out.
Cooled and trimmed cake on cake board
Place multiple long wax paper strips just under the edge of the cake, all the way around.
Here is where you'll be glad you saved all the little corner pieces.  Take two of them that are relatively the same size and shape and prop them up on the skinnier end of the base cake.  These will eventually become the tail of your marshmallow peep cake when you get it frosted.  Use toothpicks to secure the tail pieces in place.
Peep cake with tail
Your Peep Cake has a tail!
What's a tail with no head and face, you ask?  Well, it's... not appropriate for this blog post.  So take both of your bowl cakes and trim off the flat side so it's actually flat and not sorta rounded from baking. After you get 'em trimmed up, stack them (flat side down) with the bigger one on the bottom, like the pictures show. 
Building a Marshmallow Peep Cake
Put the larger bowl cake on the bottom.
Building a marshmallow peep cake
Put the smaller bowl cake on top.
You want the body of the Peep Cake to be as sturdy as the rest.  But toothpicks aren't gonna cut it here.  As picture-happy as I am, you'd think I'd take pictures of my skewers?  I'm a terrible person.  Sorry!  But you want to take a couple of wooden skewers (or thin chopsticks) and trim them to the same height as your cake.  Then, just push them straight down through all three layers of cake to help reinforce the structure of the body.  MAKE SURE YOU TAKE THEM OUT AS YOU'RE CUTTING THE CAKE AND EATING (same goes for the toothpicks)!!

Speaking of toothpicks, taking one of your remaining two corners of cake and attach it to the small round cake to make the base of the nose.  Secure it with a couple of toothpicks.
Peep cake without frosting
If you don't like how 'square' the top of the nose is, trim it down a little to round it out.
Awesome.  There you have it - a life-sized Peep!  Okay, so it looks a little funny without any frosting or sugar.  Here's the cool thing.  The frosting you're going to make is *actually* marshmallow frosting.  Same method.  
homemade marshmallow cake frosting
Freshly homemade marshmallow frosting.
Obviously Peeps aren't white, so you'll need to follow the directions for coloring your frosting.  When it's finished, it will be a slightly lighter yellow than the final Peep Cake will be.  That's okay, because you're going to cover it with yellow sugar.
Get ready to frost your Peep Cake with marshmallow frosting
I love the Spring feeling of the light yellow frosting!
This is the fun part.  Slop that frosting all over the cake!  Okay, do it carefully.  A little careful, anyway.  It will look like you have WAY too much frosting for the amount of cake, but don't fret - you don't.  Keep in mind what a Peep looks like.  You'll have to cover some parts of the cake with more frosting than other parts to get the right shape.  You could definitely take the time to smooth out the frosting with a spatula (offset or regular) so that when it's finished it looks like a nice, smooth Peep.  I definitely did not do that (I have no patience when I've got homework waiting in the wings).
Peeps Cake iced but not sugared
Close up frosted Peep cake
You would think this next part would be the most fun part.  It's a sugar party, basically.  I'll tell you the truth: it is not fun.  It's not fun IF you don't like coating your entire work space/kitchen/dining room/dog with colored sugar, anyway.  There's no real great way to sprinkle the cake with sugar.  If there is a great way, I don't know what it is.  If you do know, please PLEASE leave it in the comments for me.  Otherwise, let the sugar throwing commence.
Peep cake with yellow sugar
It's a sugar party!
Once you've got your giant Peep sugared to your liking (it took me a while, if we're being honest), put it in the fridge as the recipe recommends.  The frosting won't completely stiffen up like a buttercream might, but it will firm up a little.
cake chilling in fridge
Chill out, peep!!
Remember how I said you'd make your cake presentation prettier and easier with the wax paper?  Here's the big reveal.  Take the cake out of the fridge and put it on a flat surface.  When you pull the wax strips out, pull them one by one.  And pull them slowly and firmly, straight out from underneath the Peep cake.  You won't leave anything behind that way.
Easy baking cleanup
Pull the wax paper out carefully.
With all the wax paper and sugar out of the way, you should have a perfectly clean cake and board.  If you don't, take a moistened paper towel and carefully wipe off the remaining sugar.  Just be super careful not to touch the cake.  Why?  Think of what happens to a marshmallow when you get it wet.  Yeah, we don't want ooey gooey cake.  
Detail of peep cake
Iced and sugared Peep Cake
You're almost finished! Don't forget to give your little (big) guy his eyes.  Push them directly into the frosting - they'll hold.  

This is the best part! The big reveal!  After your guy has his eyes, you're ready to deliver him.  Or you're ready to just dig in.  I vote DIG IN!  Enjoy your Easter. :)
Food Network Easter Peep Cake
Happy Easter from my Peep (Cake) to you and your peeps!
1 Comment

Easy Easter Lemon Cookies

3/27/2014

1 Comment

 
By Amy Barton
easy lemon flavored cookies only 5 ingredients
Plain or decorated, these lemon cookies are delectable.
It's confession time again.  Easter isn't a holiday I really go out of the way to celebrate, particularly in culinary terms.  I love (LOVE!) marshmallow Peeps just as much as the next guy (okay, probably more).  I have more jelly beans in my house than I have brains in my head.  If someone makes a gorgeous loaf of bread or hot cross buns, I'm on it.  But me?  I just don't throw on my apron for Easter-y things.

Until now.  You see, I remembered one small detail about one of my favorite cookies to make:  The batter stays a batter, it doesn't really become a dough.  So most of the time after you drop it on your baking sheet, you'll end up with some round cookies and some a little more oblong - like an egg!  

You need to know about these cookies.  I call them "lemon cookies" obviously, which doesn't do any amount of justice to their unique flavor and texture.  The best way I could try to describe them would be.... think lemon spongecake meets shortbread meets sugar cookies.  They're lemon flavored and have a slightly springy, airy quality to them.  Just slightly.  At the same time, they're not a cookie that has any rise too it, and they have that floury texture sort of more like a shortbread.  BUT they're also substantial enough to be sugar-cookie-ish.  They're awesome plain (my preference), but they also take to icing or a glaze BEAUTIFULLY.

EASY EASTER LEMON COOKIES

INGREDIENTS
-  1/2 cup butter, softened (room temp)
-  1 cup sugar
-  4 eggs
-  2 1/8 cups flour, sifted
-  2 teaspoons lemon extract


DIRECTIONS
Preheat oven to 350 degrees.  In a medium bowl, cream butter and sugar together until light and fluffy (or feel free to use a stand mixer).  Add your eggs and beat them into the butter/sugar mixture until they're blended in completely.  Stir in lemon extract.  Add the flour (sift it first!) and beat it until smooth.
lemon cookie batter consistency
Your batter will not be stiff like a cookie dough - it will be more like a stiff cake batter. That's how it's supposed to be - don't fret!
Drop batter onto greased or parchment paper lined baking sheets, 2 inches apart.  Depending on the size of cookie you want, baking time will vary.  If you want a smaller, more wafer-like cookie, drop by teaspoonful and bake for 6-8 minutes or until lightly browned around the edges.  For larger cookies (as pictured here), drop by tablespoonful (or 2 tablespoons at a time), and bake 10-14 minutes or until edges are lightly browned.

Allow to cool on baking sheets for 5 minutes before removing and putting on a rack to cool the rest of the way.
baked lemon sugar shortbread spongecake cookies
Baked Lemon Cookies - see how they're slightly spongy looking? They're slightly more dense than they look, but still lighter than a shortbread or sugar cookie.
Once completely cooled, cookies will still be slightly tacky on the top for a short time.  It's not like your fingers will stick to the lemon cookies, but if you dropped powdered sugar or sprinkles on them.... you might end up with sweet decorations you hadn't planned on.  I happen to love these cookies as is, with the slight taste of lemon and the somewhat flour-y, delightfully unique texture.  


HOWEVER.. a little icing never hurt anyone, right?  Since I don't bake much for Easter, I don't have a lot of super spring-y decorations - so my cookies (some of them) ended up a little more on the bold color side.  They tasted good and bold, too!
Easter Egg shaped cookies with icing
Iced Lemon Easter Egg Cookies
After digging around, I did find some Valentine's Day decorations.  Nothing like a little culinary repurposing, eh?
Decorated lemon cookies pink and purple sugar and nonpareils
Lemon Cookies with icing, sprinkles, and nonpareils.
The great thing about this recipe is that the cookies are fairly neutral in flavor (save for the slight lemon taste).  You can add flavored glaze, icing, or frosting.  You can cook them a little longer so they're crunchier and then dip them in coffee or tea for a fantastic breakfast treat.  You can tint them any color you'd like with food coloring.  And of course, you can decorate them for any holiday or season.  

Send me your pictures - I want to see your original spin on these cookies.  Amy@AmysTreats.com
1 Comment
<<Previous

    Categories

    All
    Baking
    Bread & Bread Substitutes
    Breakfast Treats
    Condiments & Spices
    Cookies
    Dips
    Fruit
    Grain Free Goodies
    Greek Yogurt
    Healthy Snacks
    Holiday Treats
    Kitchen Tips
    Paleo
    Party Time Treats
    Protein Treats
    Side Dishes
    Sinfully Good Sweets
    Tasty Grains
    Vegan
    Vegetables
    Vegetarian

    Amy & Her Treats

    Hi. I'm Amy, and I love treats (Hi, Amy!).  Salty treats. Sweet treats. Healthy treats. Decadent treats. Wheat-free treats. Dog treats. Meaty treats.  I might need 12 steps.

    There's only one way to feed the treat craving: COOK!  Here you will find many of my creations, kitchen tips and tricks, healthy eating secrets, a few indulgences, kitchen gadget reviews, and more.

    Thanks for checking out my treats!  Want to shoot me an email? It's easy: AmysTreats@outlook.com

    Amy Barton
    View my profile on LinkedIn

    Archives

    August 2020
    November 2016
    October 2016
    April 2014
    March 2014
    February 2014
    January 2014

    RSS Feed

    Tweets by @AmysTreats

Powered by Create your own unique website with customizable templates.