By Amy Barton

Meringues can be a little intimidating, can't they? Sure, they're a cookie by technical standards. But they're light as air, somehow crunchy and delicate at the same time - they're a whipped egg white confection. Maybe most daunting of all, they're French. *gasp* I'll be the first to admit that French cuisine is a little intimidating (hell, it's already "cuisine" instead of just "cooking" or "food"), but meringues are one instance where they're surprisingly easier than you might think. If they weren't, they certainly wouldn't be showing up on my blog. You have my word on this one. And look, they can also be whimsical. They don't have to be fancy-schmancy. Yes, I'll say it: They can be the F-word. Meringues can be fun.
So go for it. Have a little fun. Cook up a little love. Click "Read More" to view the recipes and photo instructions. xoxo
MERINGUES TWO WAYS
I'm pretty easygoing. It's one of my best qualities (aside from my love of food). That being the case, I'll say this: You can use EITHER of these recipes to make your meringues. They're very similar and yield similar results. With both, your meringues will come out light and airy, crispy on the outside, and literally & figuratively melt-in-your mouth. Recipe one comes from Shannon Bowers at iVillage. You can view the original recipe here. Recipe two comes from Morgan Moore and you can view it here.
PINK MERINGUE KISSES
INGREDIENTS
- 2 large egg whites (let them come to room temperature)
- 1/2 cup sugar
- 1/2 teaspoon vanilla
- red food coloring
- 1 gallon plastic bag (Ziploc, for example)
DIRECTIONS
Preheat your oven to 200 degrees. Line your baking sheet with parchment paper (or a silpat liner). You definitely want to do this - I've had meringues fuse themselves to my naked baking sheets before. Parchment paper will solve all your problems with sticking.
In a large bowl, whip your egg whites with a hand mixer (or stand mixer) until there are soft peaks. This means going beyond the point where they're frothy. When you turn the mixer off and pull it out of the eggs and turn it upward, the pointy egg white fluff should fall over on itself - it should flop, or sag, or weep. At this point, stop mixing and add your sugar, vanilla, and red food coloring. Start with just a few drops of the food coloring to see how dark it will be. I wanted pale pink, so I only used a few drops. If you want darker pink, keep adding and mixing until you reach your desired color. Whip your egg whites until they're thick and glossy and have stiffer peaks that stand up more without falling down on themselves. It will look like this:
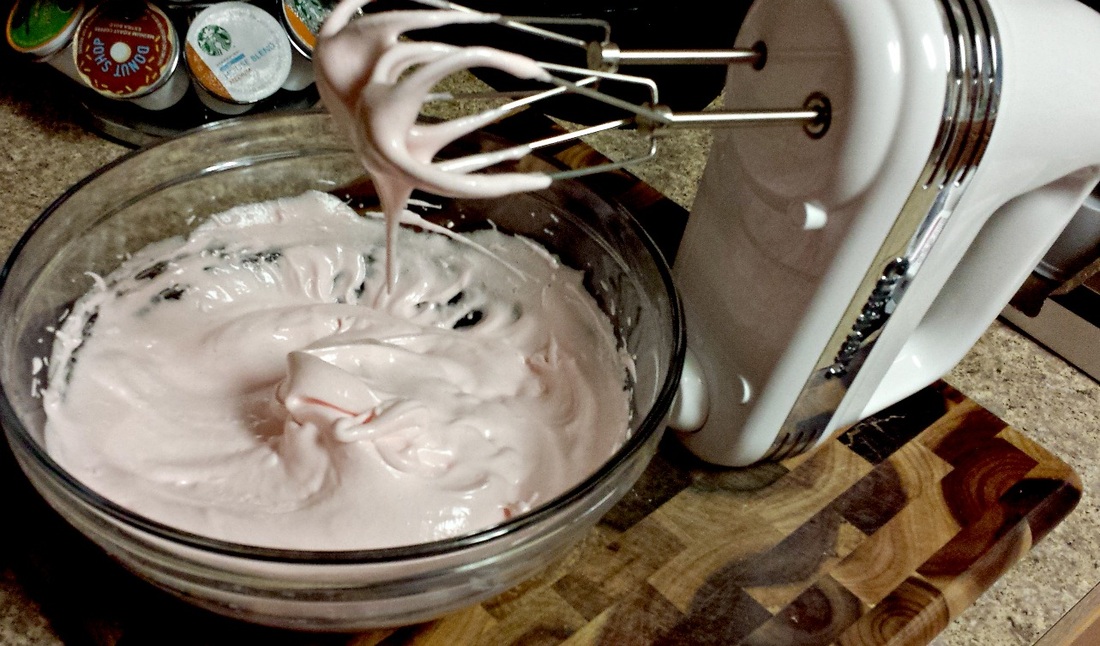 See how the egg whites get glossy and thick? | 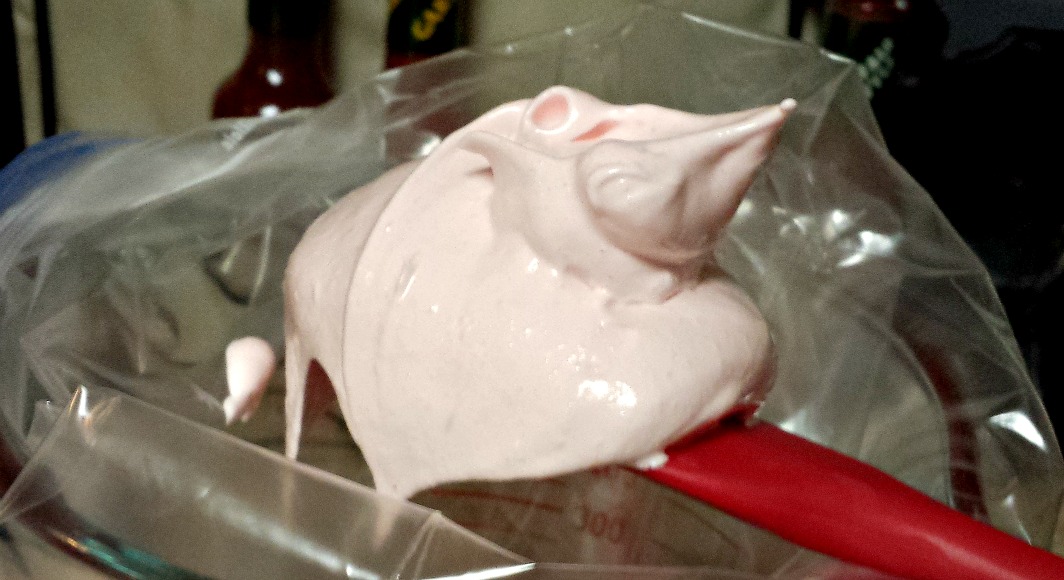 Stiffened up, the peaks will stand up. |
This is where your plastic baggie will come in handy. Take your whipped egg whites and put them in the bag, in one corner. If you have an actual pastry/piping bag, you could use that. It's just as easy (and more disposable = easy clean up) to use a plastic bag. You'll end up with something like this:
Ziploc bag turned into a decorating tool, easy peasy.
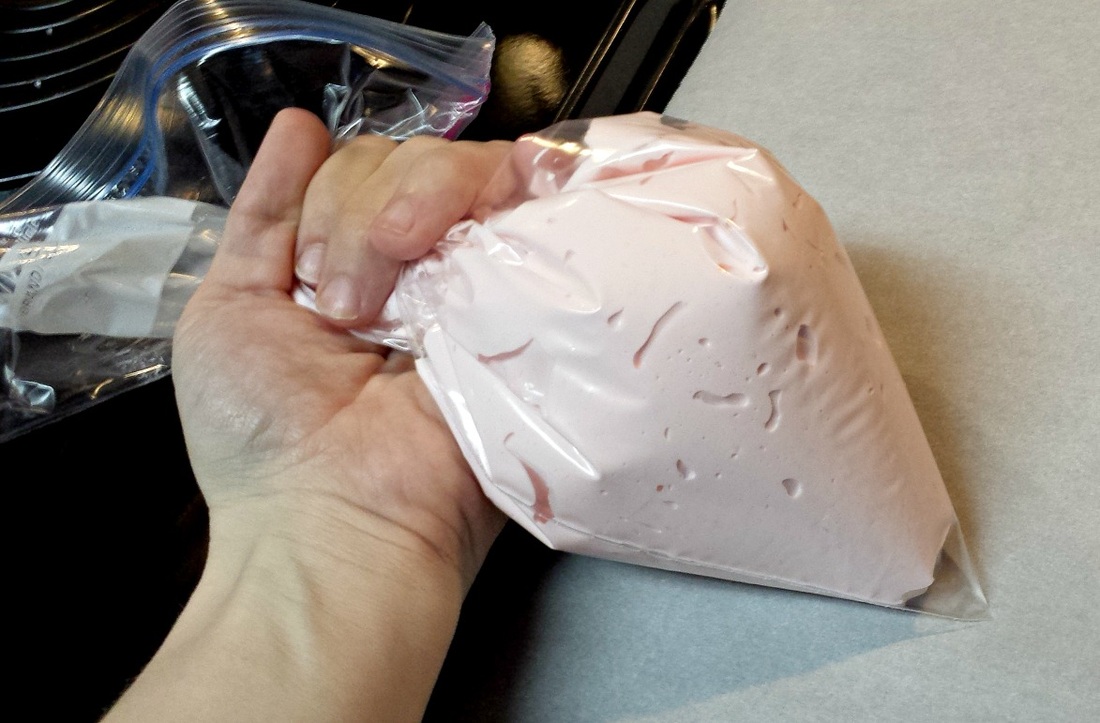
Take a pair of scissors and snip off the tip. The amount you snip off will dictate how large or small your meringues are. If you've never done this before, start small and test it out on a paper plate. The method for getting the kiss-y "curl" at the top is this: Hold your bag straight up and down, very close to your parchment paper. Begin squeezing your bag to pipe out the base of your meringue and gradually pull the bag straight up as you're squeezing. When you've got it the height you want, stop squeezing and pull the bag straight up. This will give you the little curly-q tip on top.
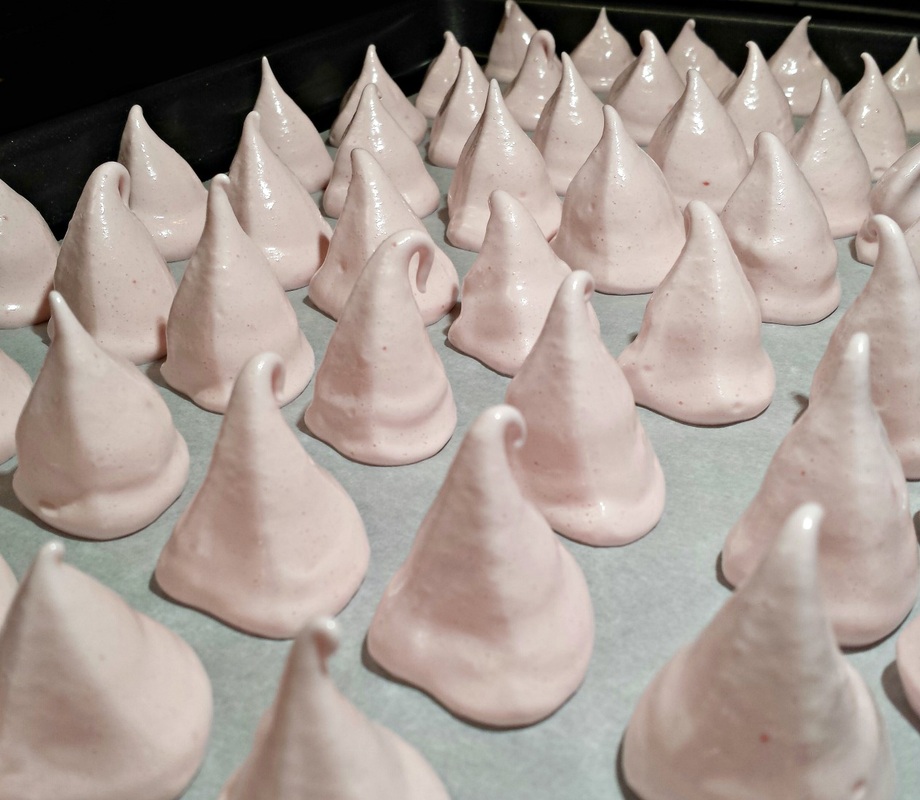
It's even easier sailing from here on out. Put your meringues in the oven for 45 minutes. At the end of the 45 minutes, turn the oven off but leave the meringues in there. Leave them for at least an hour, or until they're completely cooled. Store them in an airtight container.
They'll come out looking much like they did before you baked them, only slightly more dry. If you're feeling particularly adventurous, you could melt some chocolate and dip the bottoms in the chocolate. Then toss them in the fridge for a few minutes to let the chocolate set up.
They'll come out looking much like they did before you baked them, only slightly more dry. If you're feeling particularly adventurous, you could melt some chocolate and dip the bottoms in the chocolate. Then toss them in the fridge for a few minutes to let the chocolate set up.
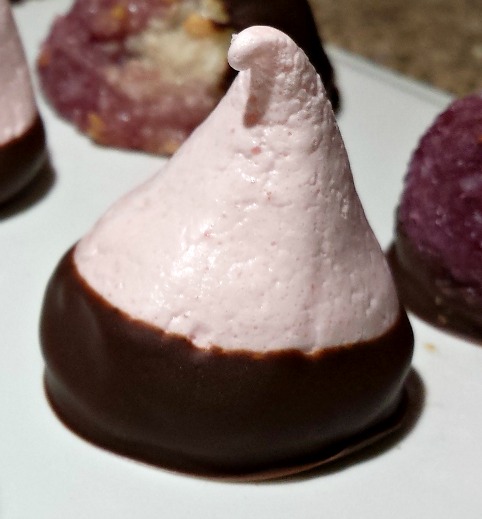
Chocolate Dipped Meringue
GLOSSY WHITE FRENCH MERINGUES
Now that you've got the method down, this second recipe will fly by for you!
INGREDIENTS (modified from the original recipe)
- 2 egg whites, room temperature
- 1 1/8 cup powdered sugar
- 1/2 tsp almond extract
DIRECTIONS
Preheat oven to 200 degrees. Be sure to line your baking sheet with parchment paper or silpat mat.
In a large bowl, whip your egg whites until foamy. Once foamy, add your almond extract and begin adding your powdered sugar a little at a time, whipping well after each addition. The original recipe says that you should allow your egg whites to whip for 30-40 minutes in a stand mixer. I don't have that kind of time. If you want them to get super substantial and super thick, then by all means, whip them for as long as you'd like. Me? I whipped them for approximately 5 minutes after all of the sugar was added in (which would account for the visual textural difference between mine and the ones pictured in the original recipe).
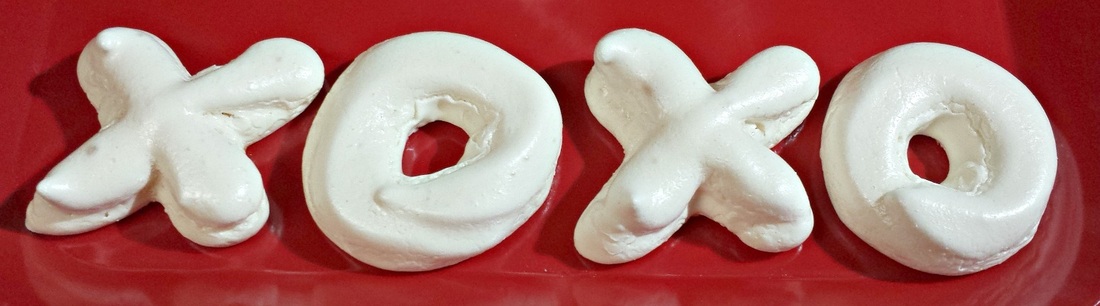
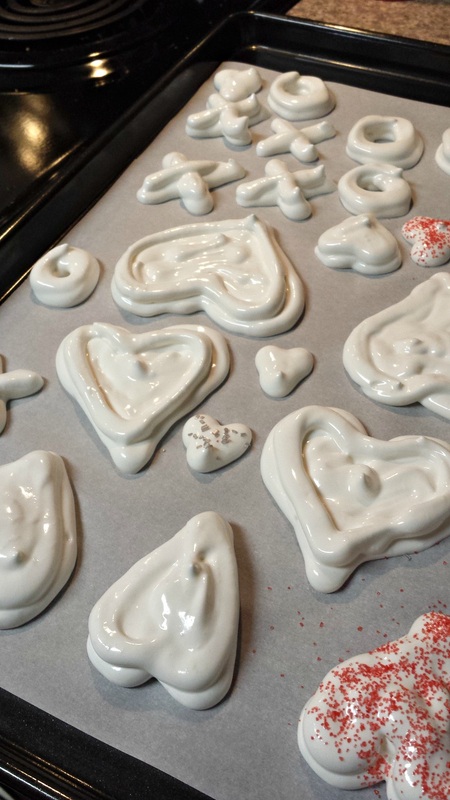
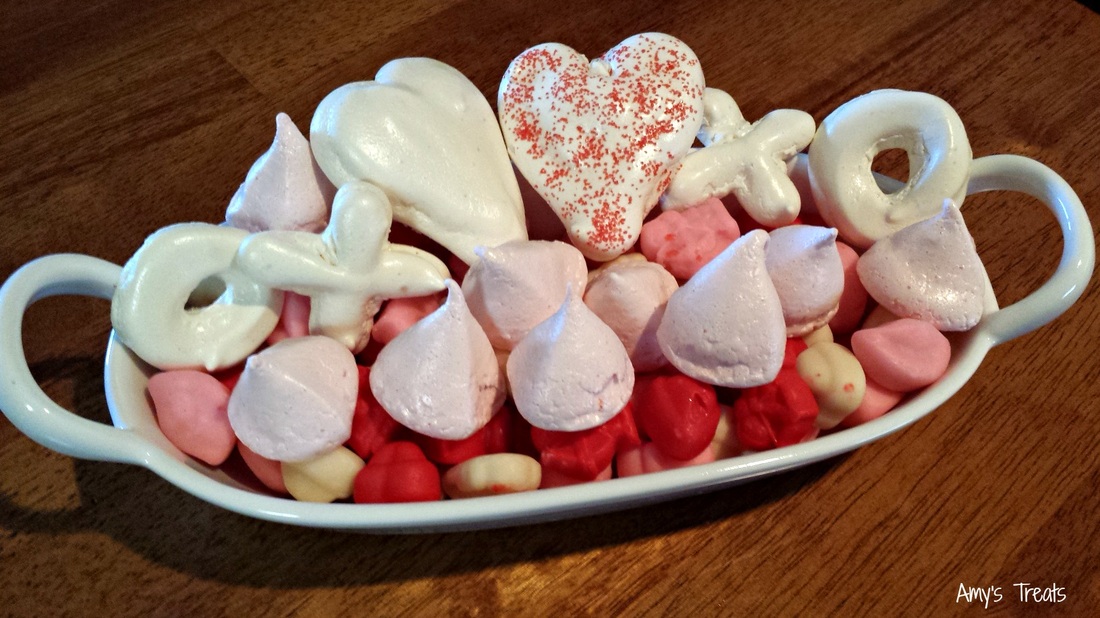
Again, you'll want your egg whites to be thick, glossy, and have stiff peaks. When they do, stop whipping and spoon them into your pastry bag or plastic baggie. Pipe them onto your baking sheet in any size, shape, or design you'd like. Since it's Valentine's time, I opted for hearts, X's, and O's. I sprinkled some colored sugar on a few as well.
INGREDIENTS (modified from the original recipe)
- 2 egg whites, room temperature
- 1 1/8 cup powdered sugar
- 1/2 tsp almond extract
DIRECTIONS
Preheat oven to 200 degrees. Be sure to line your baking sheet with parchment paper or silpat mat.
In a large bowl, whip your egg whites until foamy. Once foamy, add your almond extract and begin adding your powdered sugar a little at a time, whipping well after each addition. The original recipe says that you should allow your egg whites to whip for 30-40 minutes in a stand mixer. I don't have that kind of time. If you want them to get super substantial and super thick, then by all means, whip them for as long as you'd like. Me? I whipped them for approximately 5 minutes after all of the sugar was added in (which would account for the visual textural difference between mine and the ones pictured in the original recipe).
Again, you'll want your egg whites to be thick, glossy, and have stiff peaks. When they do, stop whipping and spoon them into your pastry bag or plastic baggie. Pipe them onto your baking sheet in any size, shape, or design you'd like. Since it's Valentine's time, I opted for hearts, X's, and O's. I sprinkled some colored sugar on a few as well.
Place meringues into your preheated oven and bake for 3 hours. Yes, you read that right. Bake for 3 hours. After three hours is up, turn the oven off and allow the meringues to cool in the oven for at least an hour (or as long as you have - just make sure they're dry). Remove from the baking sheet and store in an airtight container.
As you can see, they do lose a little of their sheen after baking, but not all of it. This is normal.
As you can see, they do lose a little of their sheen after baking, but not all of it. This is normal.
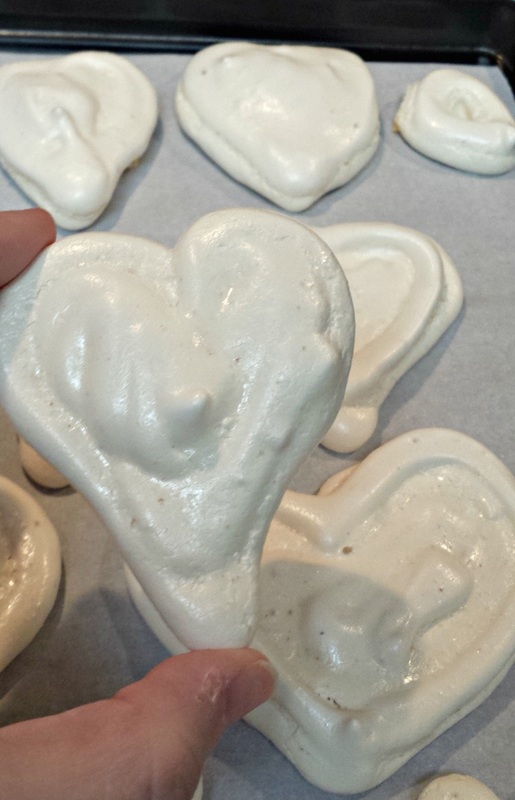
Finished heart shaped meringues.
For me, the joy in meringues is really how versatile they are. You can use any extract or flavor that you'd like. You can make them any color or shape your little heart desires - perfect for Valentine's Day or any other holiday. There isn't any easier way to be festive. IMAGINE THIS! You could make hearts like these, in pastel colors, and decorate them with words - "Conversation Hearts" Meringues! How cute would those be?!!
Happy Valentine's Day! xoxo, Cupid


 RSS Feed
